Yes, I know it's April. I got a little busy and didn't get around to editing the pictures until recently, so I apologize for my tardiness. The great thing about this craft, though, is it could be a gift for any occasion throughout the year. It's pretty awesome, if I do say so myself.
You might remember my first post on Christmas gift crafting where I made gifts for the little ones in my life. Well, this one was made for my mother-in-law and her husband. They have a large family between the two of them and several times over the last year, it was mentioned that its hard to keep track of all the birthdays. Well, when I saw this craft on Pinterest, I knew it would be perfect for them!
I set my husband to the task of tracking down the birthdays (harder than you might think), while I got to work on the fun part.
The first thing I did was drill holes in the disks. You'll need a hole in the top and bottom of each disk. I didn't measure to make sure they were perfectly equidistant or anything. I don't think that mattered. I did have to make sure to get it close enough to the edge that my jump rings would fit, but not so close that I split the wood.


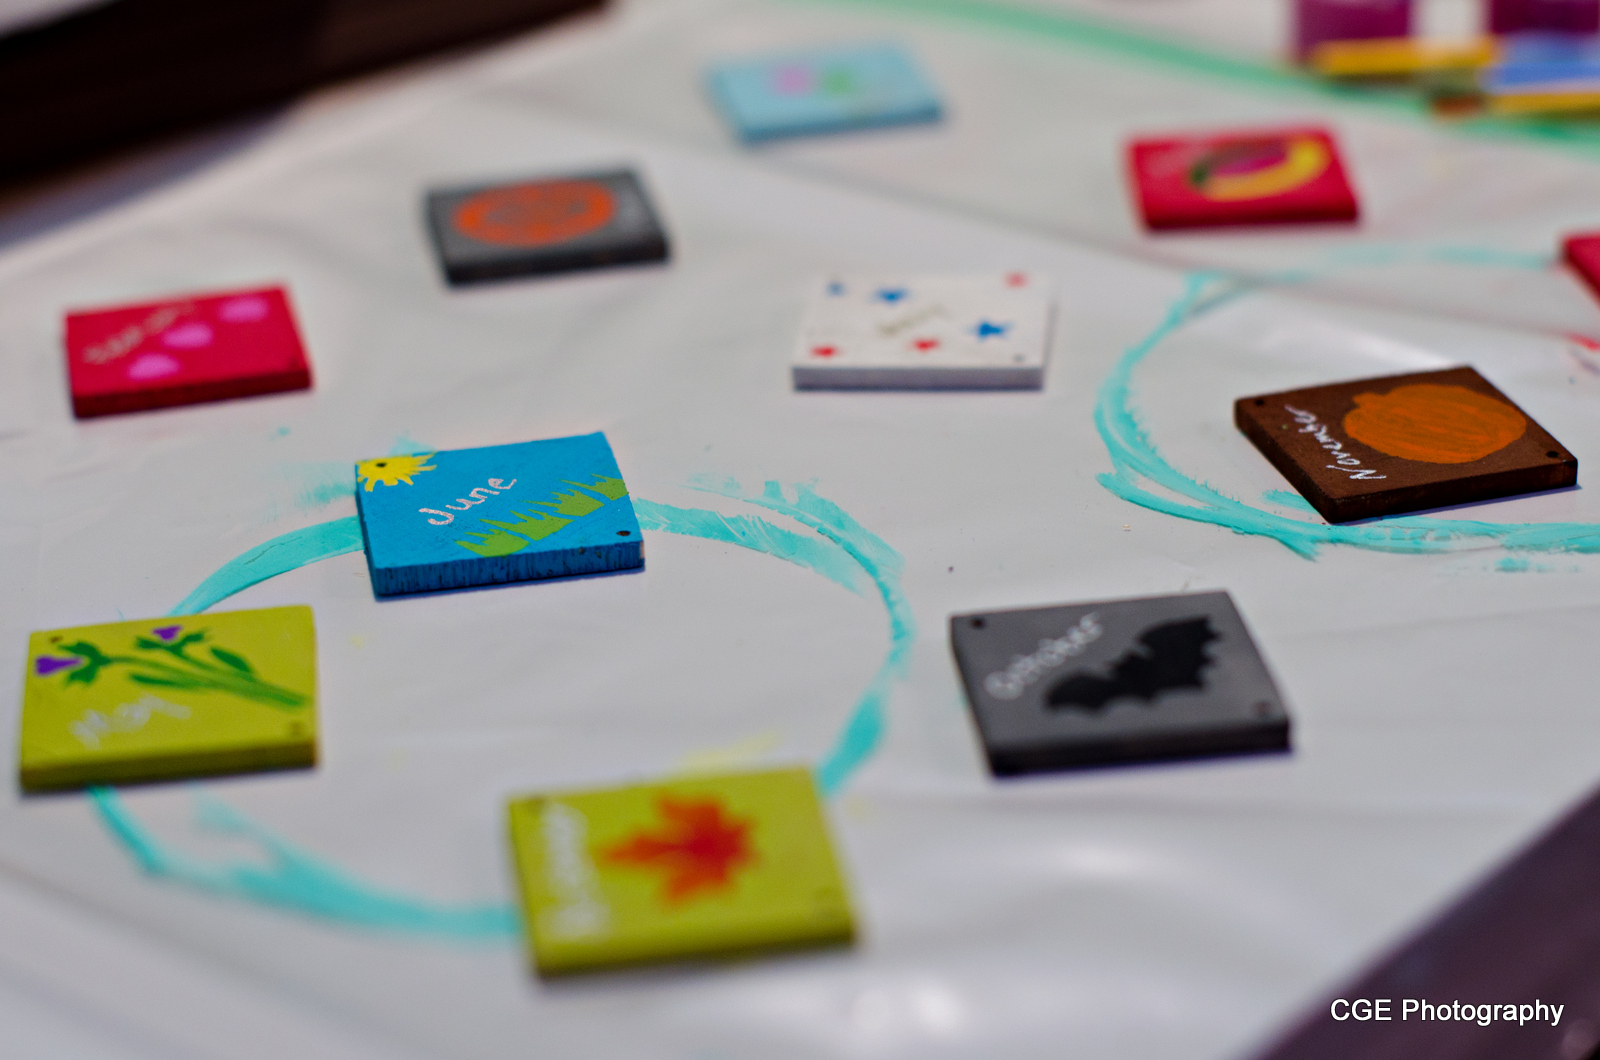
I also drilled the holes in the squares that I used for the months, but I didn't get a picture of those. I chose to hang them diagonally, like diamonds (see above), so I put a hole in two opposite corners.
Next up was painting. I've tried putting paper beneath my projects, but I hate when the paper sticks and you have to try to pick it off. So now I've started using plastic, specifically plastic bags. I already have them in my kitchen, so I just grab one or two, cut them open, and lay them out on the table and I'm ready to paint.

I painted the plaque a nice chocolate brown. I also had two decorative elements that I painted the same color as the letters, a pretty teal. I can't remember the exact name of the paint color, but it went really nicely with the brown.


After these parts were painted, I assembled them by gluing the letters and decorations on the plaque. I used a wood glue so the hold would be as strong as possible.
Much like one of the examples I found, I decided to decorate the months. I used a snowflake for January, hearts for February, basketball for March, etc. That part was especially fun.
For the disks that would hold each family member's name and birth date, I separated them according to family and painted each family a different color.

I screwed eye hooks into the bottom of the plaque, equidistant from each other, to hang the disks. This was probably the hardest part for me. Even though I'm an engineer by day, I somehow had a really difficult time with the math and had to redo it twice when it didn't work. Make sure you measure carefully!


I used fine point Sharpie paint pens to write the names and birthdays on the disks, black for the lighter paint colors and silver for the darker ones. These pens are a bit finicky. Sometimes they'd seem to dry out and sometimes the paint would come gushing out of them. But most of the time they worked well.

Then I lined everyone up where they'd need to go...

...and started making connections. I used jump rings, which you can find in the jewelry section of the craft store. Be careful when opening these to twist sideways. Don't pull the ends apart because you'll never be able to reshape them back into a circle. Just use two needle-nose pliers to gently grasp the ring on opposite sides and use a twisting motion to open the ring.

Then use one or two pliers to close it again after you've placed the disks on the ring.

And you'll have a nice chain started.

Keep adding all the family members to their month in date order. It goes really fast once you get the hang of the jump rings.

You can hang it any way you'd hang a picture. I opted for a ribbon to dress it up a little. So I used two more eye hooks on the top of the plaque to put the ribbon through.

I'm not fancy with bows, so first I tied a knot with one end of the ribbon on each eye hook.

Then I used a shorter piece of ribbon to tie a bow around each eye hook and disguise the initial, not so attractive, knot. If you know how to make prettier or fancier bows with ribbons, knock yourself out.

And here's the final product. I just love how it turned out, and they did, too!

As an added touch, since one of my sisters-in-law is expecting, I also added a blank disk (in their family color) that we'll be able to update when the little one arrives. I just attached it with ribbon for the time being.

Think this is something you might make for someone?
 |
| Family Birthday Display |
I set my husband to the task of tracking down the birthdays (harder than you might think), while I got to work on the fun part.
 |
| The supplies... |
The first thing I did was drill holes in the disks. You'll need a hole in the top and bottom of each disk. I didn't measure to make sure they were perfectly equidistant or anything. I don't think that mattered. I did have to make sure to get it close enough to the edge that my jump rings would fit, but not so close that I split the wood.
I also drilled the holes in the squares that I used for the months, but I didn't get a picture of those. I chose to hang them diagonally, like diamonds (see above), so I put a hole in two opposite corners.
Next up was painting. I've tried putting paper beneath my projects, but I hate when the paper sticks and you have to try to pick it off. So now I've started using plastic, specifically plastic bags. I already have them in my kitchen, so I just grab one or two, cut them open, and lay them out on the table and I'm ready to paint.
I painted the plaque a nice chocolate brown. I also had two decorative elements that I painted the same color as the letters, a pretty teal. I can't remember the exact name of the paint color, but it went really nicely with the brown.
After these parts were painted, I assembled them by gluing the letters and decorations on the plaque. I used a wood glue so the hold would be as strong as possible.
Much like one of the examples I found, I decided to decorate the months. I used a snowflake for January, hearts for February, basketball for March, etc. That part was especially fun.
For the disks that would hold each family member's name and birth date, I separated them according to family and painted each family a different color.
I screwed eye hooks into the bottom of the plaque, equidistant from each other, to hang the disks. This was probably the hardest part for me. Even though I'm an engineer by day, I somehow had a really difficult time with the math and had to redo it twice when it didn't work. Make sure you measure carefully!
I used fine point Sharpie paint pens to write the names and birthdays on the disks, black for the lighter paint colors and silver for the darker ones. These pens are a bit finicky. Sometimes they'd seem to dry out and sometimes the paint would come gushing out of them. But most of the time they worked well.
Then I lined everyone up where they'd need to go...
...and started making connections. I used jump rings, which you can find in the jewelry section of the craft store. Be careful when opening these to twist sideways. Don't pull the ends apart because you'll never be able to reshape them back into a circle. Just use two needle-nose pliers to gently grasp the ring on opposite sides and use a twisting motion to open the ring.
Then use one or two pliers to close it again after you've placed the disks on the ring.
And you'll have a nice chain started.
Keep adding all the family members to their month in date order. It goes really fast once you get the hang of the jump rings.
You can hang it any way you'd hang a picture. I opted for a ribbon to dress it up a little. So I used two more eye hooks on the top of the plaque to put the ribbon through.
I'm not fancy with bows, so first I tied a knot with one end of the ribbon on each eye hook.
Then I used a shorter piece of ribbon to tie a bow around each eye hook and disguise the initial, not so attractive, knot. If you know how to make prettier or fancier bows with ribbons, knock yourself out.
And here's the final product. I just love how it turned out, and they did, too!
As an added touch, since one of my sisters-in-law is expecting, I also added a blank disk (in their family color) that we'll be able to update when the little one arrives. I just attached it with ribbon for the time being.
Think this is something you might make for someone?
Comments
Post a Comment